Table of Contents
- Introduction
- Drone Videography Basics
- Shooting Compelling Video
- Static vs Dynamic Drone Videography
- Single-Axis Video Movement
- Aerial Camera Moves
- Drone Videography Summary
Introduction
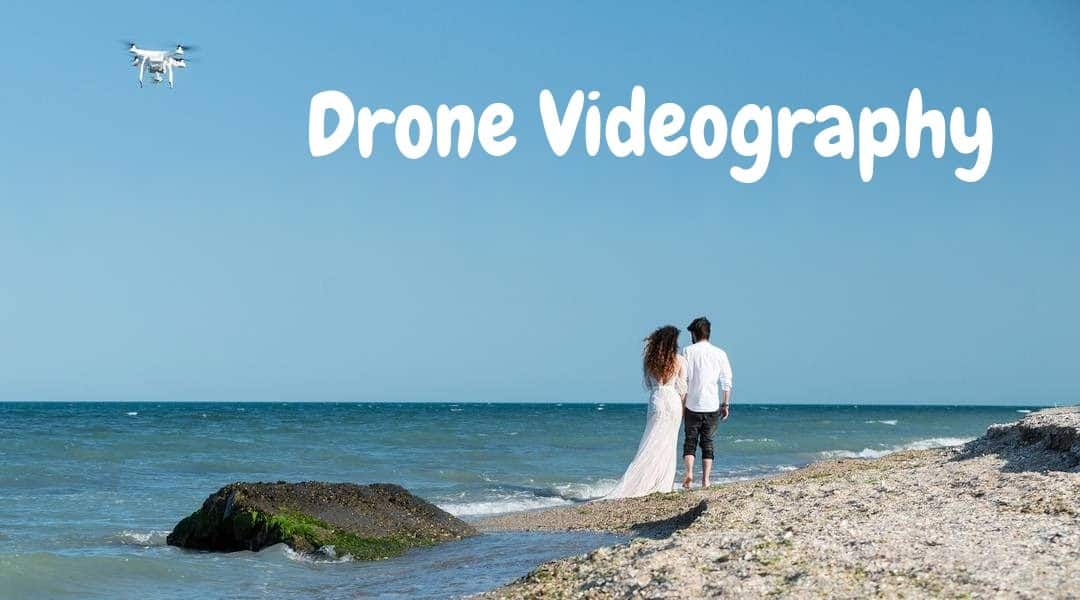
Using a camera-equipped drone to capture stunning drone videography can add significant production value to any project. Before drones became more easily accessible, you would need to hire an expensive helicopter and air camera crew to capture stabilized aerial videography. Now, for just a fraction of the cost, you can buy your own drone and capture stunning aerial videos yourself. You can fly lower than a helicopter and fly through obstacles that would be impossible for a full-sized helicopter. Also, you avoid the strong downwash that a helicopter produces that can affect your scene.
Aerial video is commonly used for specialized shots, such as establishing shots to anchor the action to a location. Drone videography is perfect for providing different viewpoints and add visual interest to high-speed action scenes. These aerial scenes can add an element of emotion to a scene with slow-moving pan shots over a scene.
Aerial video isn’t just used for making films. There are many practical industrial uses such as real estate, surveying, inspection, and construction. This article presents some common camera moves that are commonly used in Hollywood film sets.
Drone Videography Basics
Use a Drone Camera Gimbal
To improve the video quality from your drone footage, you may want to consider either buying a drone that comes with a camera gimbal or has the lifting capacity to allow a gimbal to be attached (see Figure 1). A gimbal is a stabilization support system that lets the camera stay pointed in a fixed direction regardless of how the drone rotates.
You can do a very simple exercise to understand how a single axis motorized gimbal works. Look straight ahead and look at something. Now turn your head slightly to the left, then slightly to the right. What is happening is that your eyes are rotating in the opposite direction that your head is turning, so that you keep looking at the same object.
To do this mechanically, you need a sensor that detects any change in the drone body, and a motor that turns the camera in the opposite direction so that it keeps pointing in the same direction. Do this for all three rotation axes and your camera will always point in the same direction.
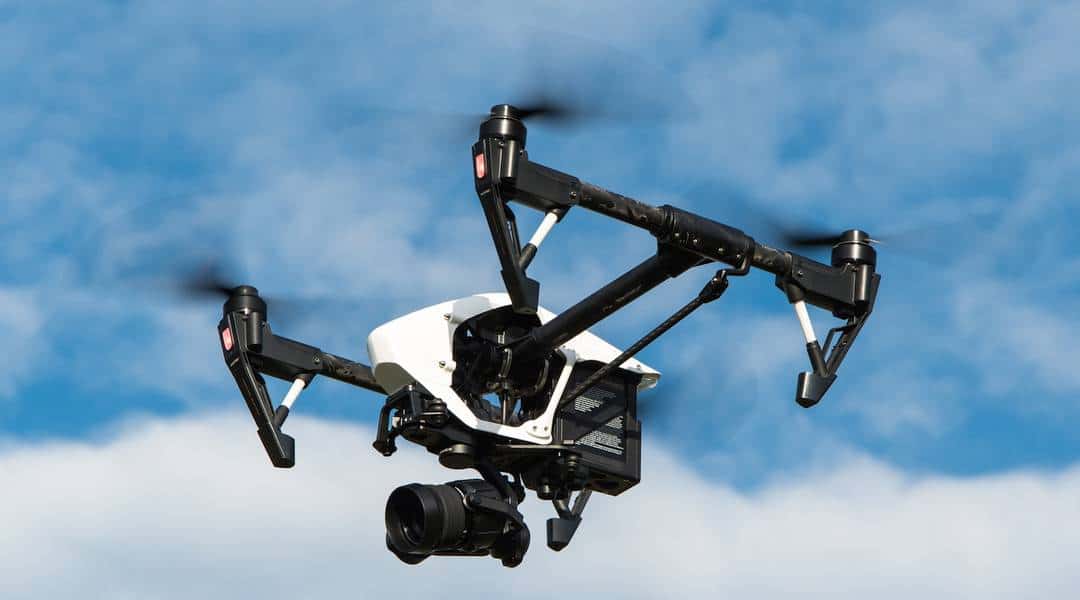
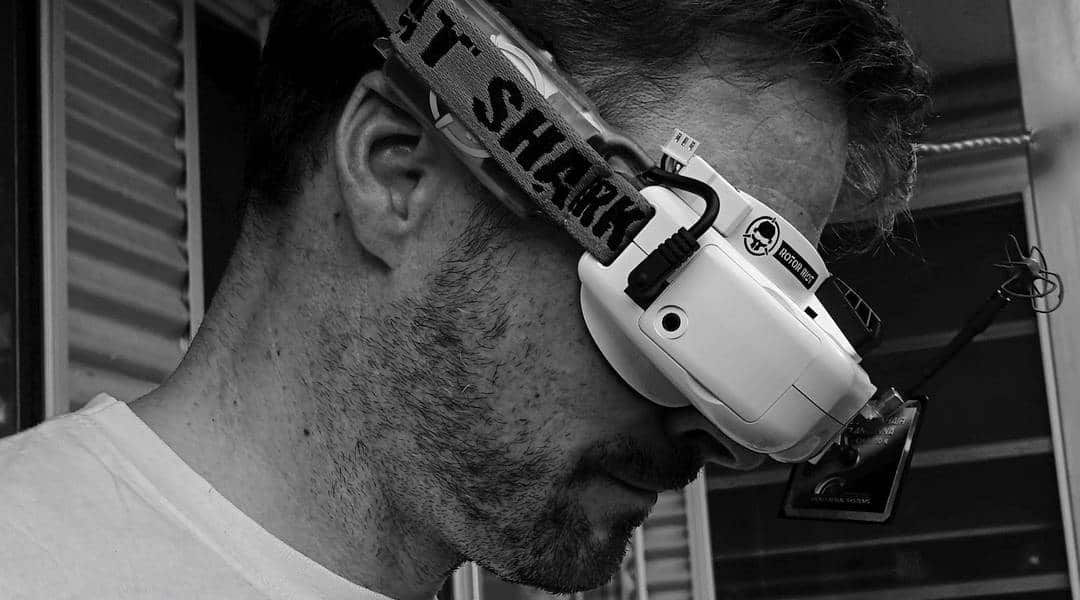
Figure 1 – Drone Camera Gimbal
Figure 2 – First Person View
Use First Person View in Video
It is essential to be using a first-person view drone system to capture the highest quality videos (see Figure 2). You won’t be able to frame your shot perfectly if you are not looking through the eyes of the camera. Try to use a large screen such as a table instead of a smartphone. Details and angles will be more apparent on the larger display.
Drone videography professionals use a two-person system where one individual is piloting with one set of controls, while another person has controls specifically for the camera. This way the
Video Size and Frame Rate
For consumer cameras, the video size is usually described by using two to four parameters.
The resolution is the horizontal and vertical size of the screen measured in pixels. For example, 1920×1080 means 1920 pixels wide, and 1080 pixels high.
The framerate is the frequency at which images are displayed to create the resulting video motion. Frame rates can range from 14 fps to 240 fps.
Video Exposure Settings
Video exposure is the proper combination of shutter speed, aperture, and ISO settings in order to get the right amount of light to hit the sensor for the proper exposure.
Shutter Speed
When you are shooting video, you want the shutter speed to be twice the frame rate. So, if you are shooting at 30 fps, you want a shutter speed of 1/60. If you are shooting at 24 fps, then 1/50 will be the best shutter speed setting.
The reason for this is motion blur (see Figure 3). When you take a photograph, you want the photo to be as sharp as possible. However, if you use sharp frames in
Figure 3 – Drone Videography Motion Blur (Left with, Right without)
Neutral Density Filters
Most videographers shoot during the day using neutral density (ND) filters which are like putting sunglasses on your lens. This reduces the amount of light that hits the sensor and lets you shoot with a lower shutter speed. You can also use polarizers that cut out some of the light in conjunction with an ND filter.
Aperture
This is the lens opening through which light passes to hit the sensor. When the aperture is lower, it needs to be open for longer to properly expose the sensor.
Currently, it’s only larger drones that can carry cameras that have an adjustable aperture. Most small drones with an integrated camera use camera with a fixed aperture of f/2.8 which is very light sensitive. Not having a variable aperture is likely to change as more advanced cameras make their way into consumer drones.
Camera ISO
This parameter represents the sensitivity of the sensor. A lower ISO is low power, so you will need more light to pass through the lens. Higher ISO will require less light but results in more noise in the image.
Shooting Compelling Video
A common mistake is to make your entire flight your video. If you do this, it will simply bore your audience. You don’t want your video to start off boring, with a great shot in the middle, followed by more boring shots, and then the drone lands.
You want to make your videos compelling by planning interesting short shots to tell a story. The final video is produced by arranging these shorter shots together in post-production. There are three sequences that you need to follow to plan your video shots (see Figure 4).
The Setup
Move your drone into position and line up the nose of your drone in the intended direction. Frame the shot and be sure there are no obstacles in the flight path. The setup should start a few meters before the actual shot will begin so you are moving at the right speed and direction. This will give you a chance to make minor course corrections before the shot.
The Shot
This is where you get to hit the record button and start shooting your video. Make sure you don’t make any sudden jerky drone motions. Stay steady on the controls and only make smooth adjustments on the joysticks. If you are watching your FPV screen and see a better shot, don’t be tempted to change your plan. Finish your current flight line, then go back and do another run.
The Follow Through
When you think you have finished your shot, keep flying for a few more seconds. A good shot is all about the follow through.
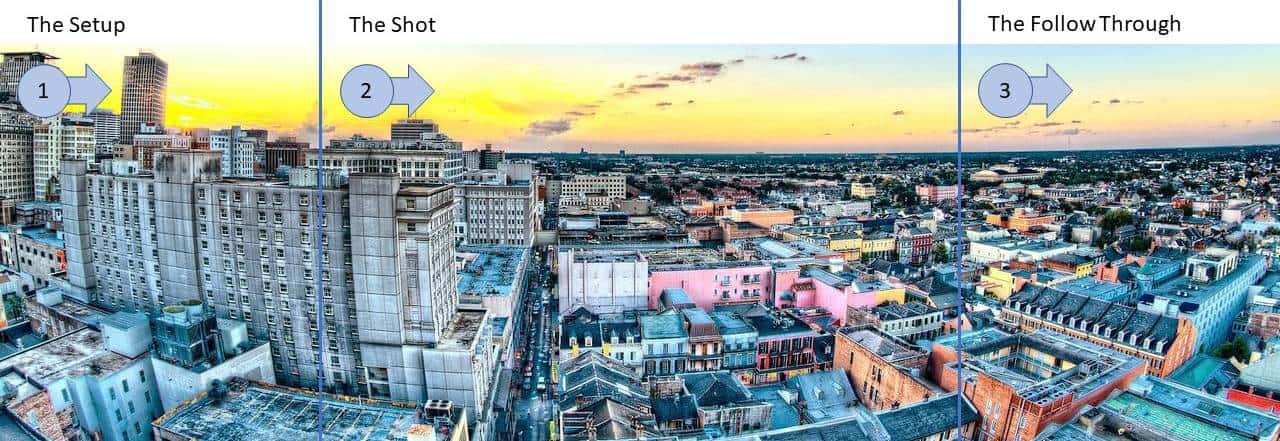
Figure 4 – Making the Shot
Static vs Dynamic Drone Videography
This is the most basics of drone videography shots. You move your drone into a position, hold it there and start recording. You can get some great shots by letting the scene move in front of the camera. Before venturing into taking dynamic shots, you should play with taking static videos, so you can get used to watching the screen and using the controls.
What you want to build up to is taking dynamic drone shots. This is where the drone is moving. There several ways to move to get the perfect video. You don’t need to execute complex flight patterns to get an exciting video. Starting by doing the basic single axis movements before advancing to the advanced motions. Be sure to take your time and move smoothly.
Single-Axis Video Movement
Pan
The pan shot is where you rotate the drone while holding its position (see Figure 5). This kind of shot is very common when using a tripod. On the drone controller, this is accomplished by yawing slightly on the left control stick.
Tilt
The tilt shot is similar to the pan except you are panning vertically, instead of horizontally (see Figure 6). This type of shot gives the illusion of things falling, which gives a more exciting feel. The tilt is accomplished by tilting the gimbal downwards or upwards,
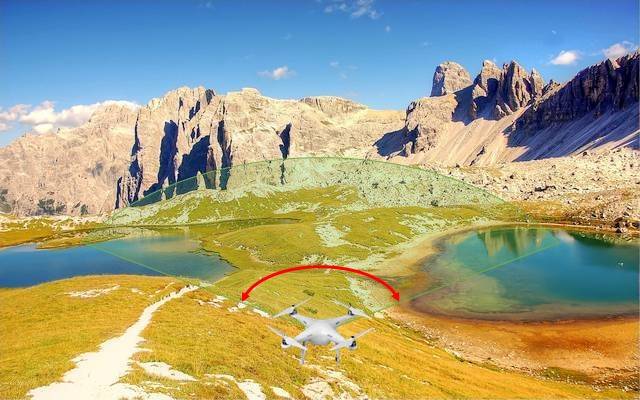
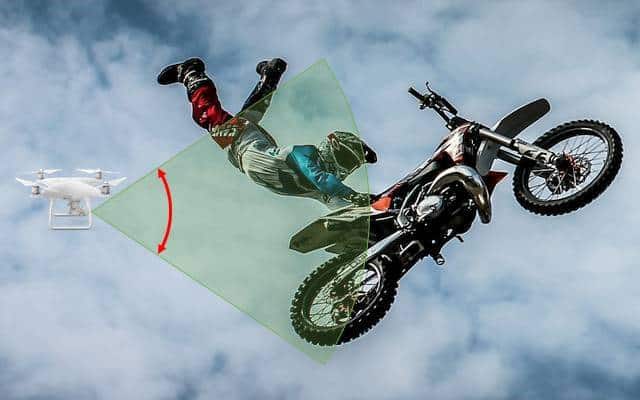
Figure 5 – Pan
Figure 6 – Tilt
Dolly
A dolly shot is when you move the camera from side to side (see Figure 7). This shot works very well when you are behind an obstacle and slide out to shoot the action. You will need to fly sideways while keeping your camera facing forward.
The trick to this shot is flying sideways while keeping the camera facing forward. This may be challenging to do this at first, but after a few hours of
Zoom
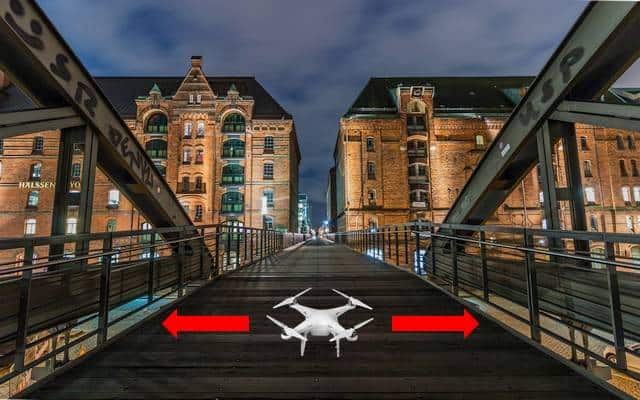
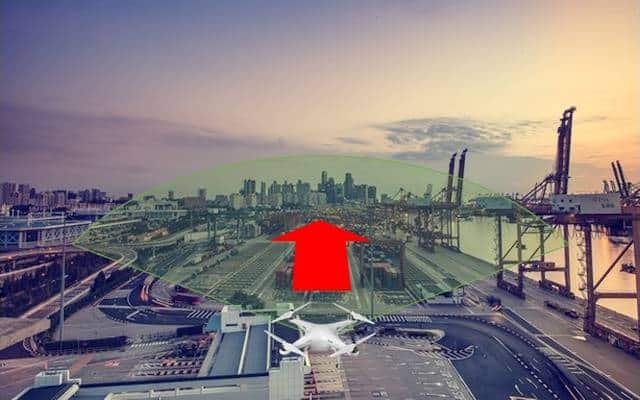
Figure 7 – Dolly
Figure 8 – Zoom
Aerial Camera Moves
Establishing
The establishing shot is a classing video shot that establishes the location and sets the mood of upcoming shots. These kinds of shots are usually from a distance and wide angle (see Figure 9).
These types of shots were historically expensive to create and needed a helicopter or a crane. This kind of shot can be a fly through, stationary or a reveal.
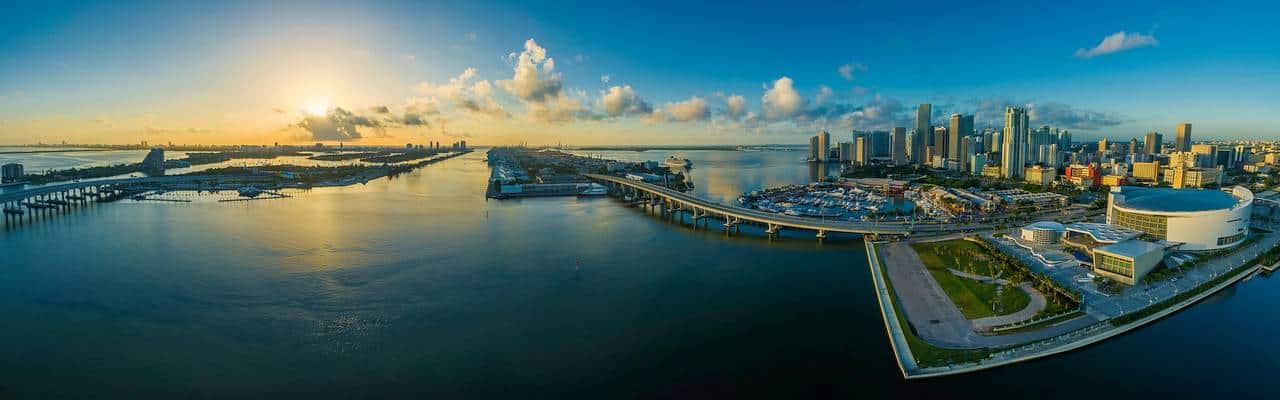
Figure 9 – Establishing Shot
Orbit
An orbit shot is when you fly around the target in a circle while keeping the camera pointing at the target at all times. This type of shot is usually available as an intelligent flight mode.
Alternatively, you can accomplish this type of shot manually. Start by pointing your camera at the target and set your desired altitude. Move the drone to the left or right while giving the drone some yaw to steer around in a circle.
This can take a bit of practice to get the coordination right, but you just need a few hours of practice.
Flythrough
A flythrough is a fun and exciting shot to watch. This is where you are going to fly right through the middle of your scene. Keep the drone flying slow and steady. If you need more speed, you can do that in post-production.
Before shooting the flythrough, be sure to plan your flight path. Try to find an interesting flight path that follows something along the ground. With some more experience, you can fly through objects such as between trees, or through openings.
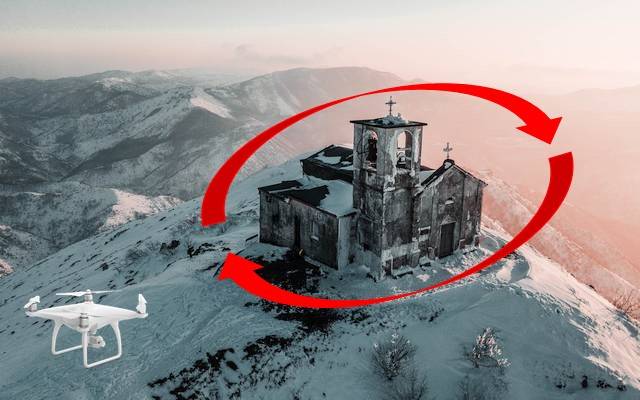

Figure 10 – Orbit
Figure 11 – Flythrough
Flyby
A flyby is similar to a fly through, except that the camera rotates to keep the camera focused on the target object. The aircraft remains flying in a straight line. This shot can be a bit tricky because it involves rotating the camera as you fly in a straight line.
This shot is made easier when using an intelligent flight mode.
Elevator
An elevator shot is when the drone moves straight up or down. The first type is when the camera is stationary and follows the drone motion up or down. The camera can point straight ahead while the drone changes altitude.
Another option is to change the drone altitude while keeping the camera locked on target. The hard part is tilting the camera down while the drone altitude is increased. With a bit of practice, you’ll perfect the smooth motion and won’t be able to notice that the camera is tilting.
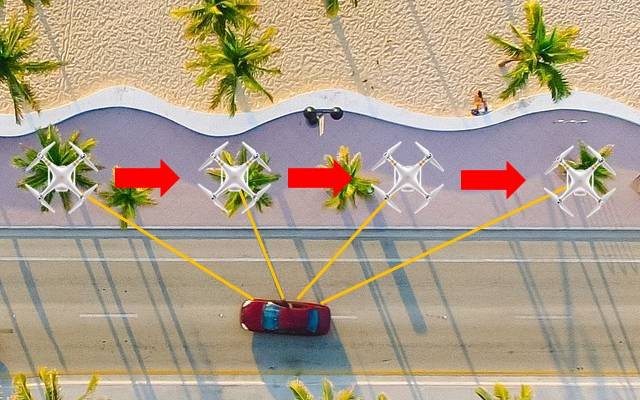
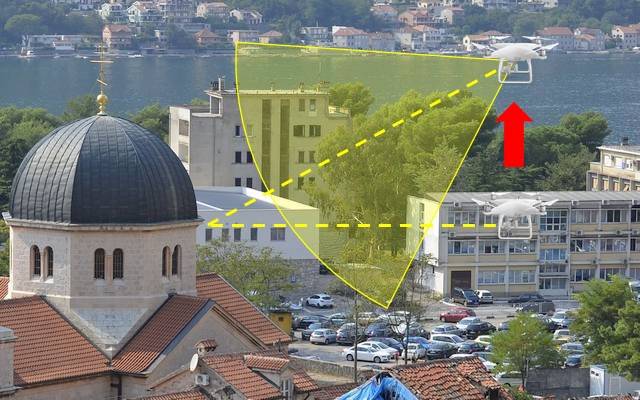
Figure 12 – Flyby
Figure 13 – Elevator
Chase
The chase cam shot follows your target while filming it from above, beside or from the front. The trick is to match the exact speed of the target. There is the added uncertainty of the object changing directions.
You can simply the shot while hanging back a bit while shooting at a slightly higher resolution. This will let you keep more of the action in frame, and you can smooth out the transitions in post-production.
Bird’s Eye (top down)
The bird’s eye view is when the camera is pointing straight down while flying. This is a classic eye in the sky shot that carries a lot of visual
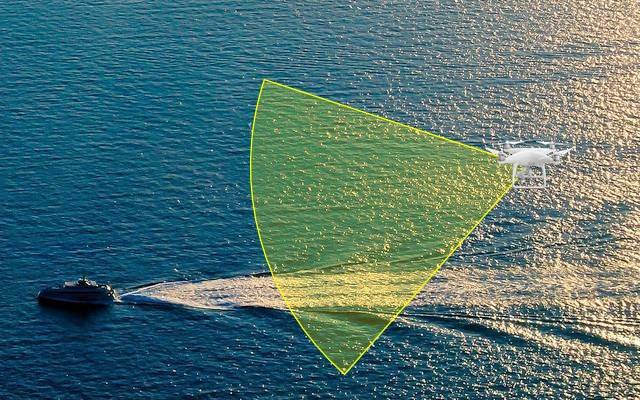
Figure 14 – Chase
Figure 15 – Bird’s Eye View
Drone Videography Summary
The most important thing you can do to improve your drone videography footage is to become a skilled pilot. There is no substitute for stick time and spending all your time at a workbench instead of flying your UAV in an open field will never yield great footage.
It’s best that you hone your skills using an inexpensive drone. If you can master a small quadcopter, you will be able to transfer those flying skills to larger and more advanced drones.
Shooting cinematic drone videos is an art form. Sometimes an unorthodox technique can result in some brilliant results. Hopefully, these tips will help to give some flying techniques that you can use to tell an amazing drone videography story.
References
Rocky Nook
6 Tips to Make Your Aerial Videography Stand Out
Aerial Video
Aerial Drone Photography